- If your oven temperature is questionable, invest in an oven thermometer. Some ovens can be off by as much as 75°.
- Before mixing the batter, prepare the pans, turn the oven on, and make sure the rack is in the center.
- Shiny pans reflect the heat, and are your best choice for cake baking.
- Reduce the oven temperature by 25° when using glass pans.Substitute 8-inch square pans for round if you want, or use 2 to 3 8 X 4-inch loaf pans. The baking time will be less, so begin checking about 15 minutes before the time suggested.
- Have all ingredients at room temperature for best results.
- Grease pans with about 1 tablespoon of fat per layer pan.
- Use cocoa (or carob powder) instead of flour for dusting a greased pan when making a chocolate cake.

Tuesday, March 17, 2015
Cake Baking Tips - Part II
This newsletter is
the 2nd installment from the cake baking tips series
which will focus on baking temperature and cookware. So bake that
cake and eat it too!
Tuesday, August 31, 2010
Cake Baking Tips - Part I
This newsletter is the 1st out of six installments from the cake baking tips series which will focus on General/Overall cake baking tips just to get you started. Subsequent newsletters will focus on more specific topics such as baking temperature, cookware, ingredients and techniques, mixing, baking, frosting, and what to do when your cake doesn't turn out as expected. So bake that cake and eat it too!
• If you want a perfectly flat top use the flat bottom of your cake for the top. (Flip it over)
• If your oven is too hot your cake will rise too much in the middle. Wait till your oven is fully preheated and use an oven thermometer to ensure proper oven temperature.
• Add moisture and flavors with Simple Syrup, add extract flavors or espresso flavorings to your syrup and brush it on.
• If your cake is too high in the center take a long serrated knife and cut the top off, but wait until your cake has cooled before cutting.
• If your cake is crumbly and hard to frost brush on a little Simple Syrup and freeze. It will set up and be ready for frosting.
• Sprinkle chopped nuts onto the sides of a frosted cakes. Walnuts Pecans and Almonds make good decoration and it also adds flavor and nutrition.
• Investing in top quality chocolate, fruit fillings, nuts etc, makes a tremendous difference. Your cake will taste its best when starting with the best ingredients.
• Always use fresh eggs. Eggs separate best when cold, egg whites need to be at room temperature for greater volume when whipped, remember this when making a meringue.
• Real Butter gives the best flavor. A cake is a treat so live a little.
• When decorating a cake with icing, you can make a quick decorating tube. Put the icing in a heat-safe zip-lock plastic bag. Immerse the zip-lock bag in simmering water until the icing is melted. Snip off the tip of one corner, and squeeze the icing out of the bag to decorate.
Friday, July 2, 2010
Pastry Chef Demonstration - Ron Ben-Israel


I started my 4th of July 5-day weekend by attending another wonderful chef demonstration at The French Culinary Institute. Chef Ron, dubbed "The Wedding Cake Master", attempted to ice, structure, decorate, disassemble, cut and serve a three-tiered wedding cake in under two hours... and that is just what he did, all the while entertaining us with the history of how he got started in the pastry business and answering our eager questions. The cake was of course, delicious. I am having a great learning experience at these demonstrations and can't wait to be able to apply these techniques to my own creations.
Friday, June 25, 2010
Chef Demonstration at The French Culinary Institute


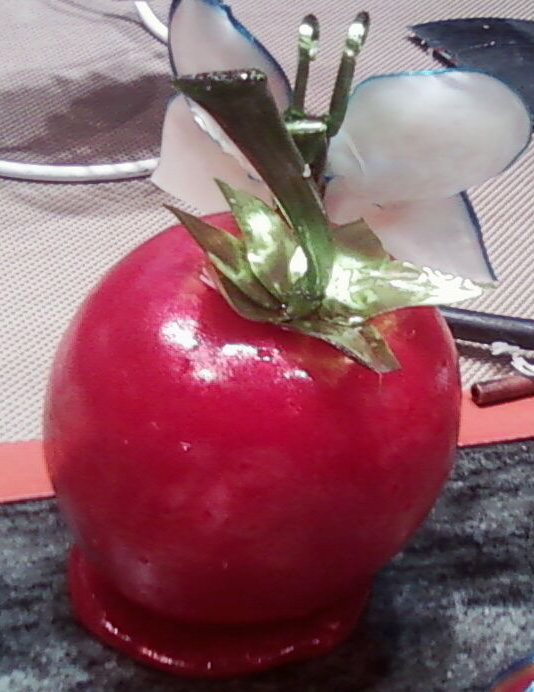
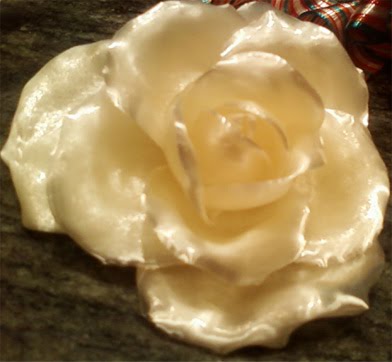
This past Tuesday I attended a chef demonstration of wonderful sugar work created by Master Chef Jacques Torres at The French Culinary Institute. It was an incredible presentation and a great learning experience. He provided step my step instructions from boiling the sugar, pouring and cooling the sugar to the final creation of these lovely pieces (a rose, strawberry & butterfly, an orchard, and a ribbon. I honestly felt as if I could go home and re-create these on my own and I can't wait for the next chef demonstration.
Monday, July 13, 2009
Tips for Melting Chocolate
Whether you’re baking brownies, chocolate cake, or making chocolate truffles, they all have one thing in common, CHOCOLATE !!! Something most people love to eat but it's not always easy to work with. Whether you are working with dark, semisweet, milk, or white chocolate, using a microwave, or a hot-water bath, there are a few fundamental tips you can follow to help you avoid some of the common pitfalls:
- Make sure the chocolate is chopped into uniform pieces to ensure even melting. Never try to melt large bars or blocks of chocolate that have not been chopped.
- Make sure to keep the chocolate dry as it melts. Unless the chocolate is being melted in a large amount of water (2 tablespoons water per ounce of chocolate is the minimum amount), AVOID all contact with water! Chocolate will become unworkable if it comes into contact with even a few droplets of water. It will seize up, or become hard and lumpy. Even the steam from the bottom of a double boiler can cause this problem. If it does seize, you can blend in a teaspoon of vegetable oil (NOT butter or margarine) and the chocolate should smooth out. Make sure your bowls, workstation, and spatulas are completely dry.
- Melt the chocolate slowly over low heat. Chocolate is very delicate and can become lumpy or grainy if overheated.
- Stir the chocolate frequently with a rubber spatula once the outer edges start to melt.
- Chocolate retains its shape when melted, so the only way to know if it is truly melted is to stir it. Do not rely on appearances alone.
Subscribe to:
Posts (Atom)